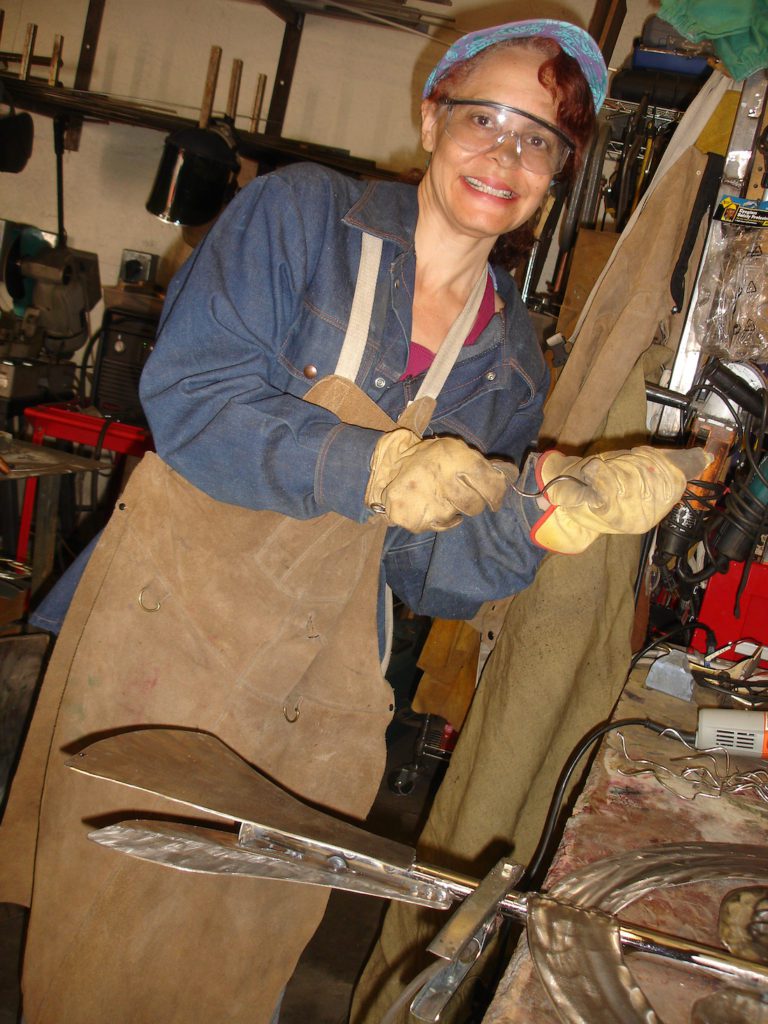
In May 2012, I retired from a 36-year career with the California Highway Patrol as a researcher, technical writer, and manager. I was ready to jump in 100% the Kanika Marshall Art business I established in 1993.
Originally a clay artist, I incorporated African fabric and glass to make mixed media masks, figurines, pottery, and jewelry. In 2009, my talented welder friend, Kristen Hoard, taught me how to weld outdoor sculptures from recycled (junk) metal. She allowed me to use her Sacramento studio for several months until I purchased my MIG welder in May 2010. Here’s a blast from my Evolution of a Metal Artist blog from late 2011.
********
This week, I was performing my civic duty in the jury box, but when the judge announced Friday was a day off, I dreamed of having a fun day in my studio. After breakfast, I donned old clothes and my leather apron, then parked my car in the driveway to make room in my metal and ceramic shop (AKA garage).
MY FIRST GOAL for the day was to find a simpler way of removing the rusty/bluish-black flaky coating, called mill scale, that coats hot-rolled sheet metal and other types of recycled steel (right) to keep it from rusting. The stubborn mill scale must be removed so a good weld can be made when trying to weld pieces of recycled (AKA junk) metal to create a new art sculpture. Kristen likes to sandblast her art pieces to remove excess scale, but admits it’s difficult to get a shiny finish on the clean steel.
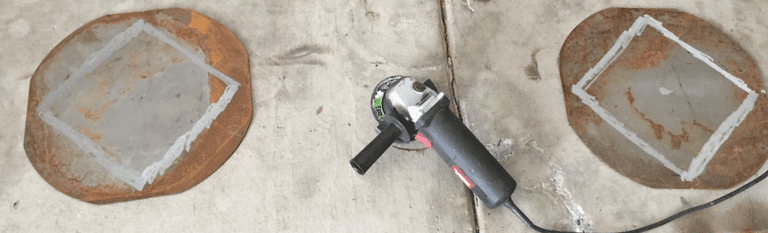
I usually use a grinder with several grinding pads to get rid of the grimy, oily scale. This takes a long time and strips too many grinding pads to be cost and time effective. Grinders are also noisy and throw sparks everywhere, like the “sparkler” fireworks on July 4th.

The steel is so shiny after a good grinding, but a LOT of grinding disks and HOURS of effort were used to scrap off the scale on this five-foot tall body and head.
I read on the internet that muriatic acid is used in swimming pools to reduce the pH level—one gallon acid to 20,000 gallons water. Neutralizing it with an alkaline substance like soda safely disposes of any remaining acid. Oh good. It won’t dissolve my fingers, like in a horror movie, if I get acid on my hands. It was time to try this potentially timesaving procedure. None of my metal artist friends on Facebook had ever tried this dunking-in-acid practice. Time to experiment!
I bought a sturdy orange plastic “Homer” Home Depot bucket to hold the diluted acid, as well as fashionable matching orange rubber gloves. I filled another large plastic bucket with clean rinse water, readied my smartphone to videotape the process, assembled a dozen 6″x6″ pieces of grimy recycled metal, and grabbed an old sponge with a green scrubber pad on the back. I crossed my fingers that this process would work.
Steve said the ratio of acid to water was about 75% to 25%, but I was concerned that such a strong concentration might eat through the bucket (which was a crazy worry since full-strength muriatic acid is packaged in a plastic bottle). I was conservative and added two quarts of water to one quart of acid.
Suddenly, acrid smoke began rising from the bucket into my eyes and filling my nostrils! I ran to get a face mask and safety glasses before proceeding any further. My test would start with two quarts water to one-half quart of acid, outside in my side yard with plenty of fresh air.
I half-filled another plastic container with water, then slowly lowered one 6×6” square of metal covered with a greasy scale in the bottom of the acid bucket, intending to leave it in for 30 minutes, as Steve suggested. After only 10 minutes, though, whitish flecks appeared throughout the scale. Something was happening!
Using a wooden spoon, I scraped the once totally speckled metal in the bucket’s bottom. Magic! The scale easily came off. I lifted the piece out of the bath with my gloved hand and rinsed it off thoroughly. So shiny and clean (right)! I made a video showing the difference between the acid-washed metal versus scale-covered ones. Vast difference––and only after 10 minutes.
Then I got braver and put three pieces in the bucket, in a triangle formation. Since the acid bath only came up to half of the pieces, after 10 minutes, I turned them over and let them “cook” themselves clean for another ten minutes. How cool was this? After putting in four more pieces (one on bottom, three on sides), I took the four acid-washed pieces to my sunny side yard concrete to let them dry.
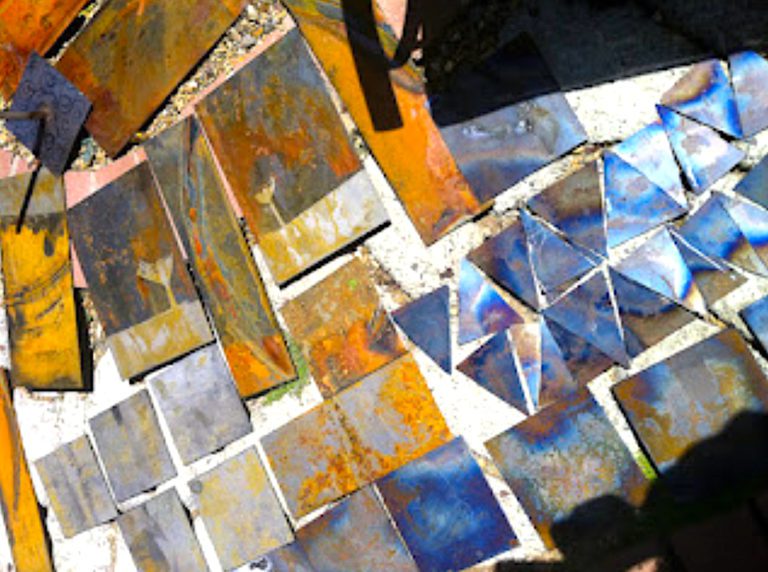
What? After checking on my clean babies, I was shocked to find them rusting on the concrete! Duh! That’s why they are coated with oil. Steel rusts with moisture! But this was merely a slight orangey coloring, not heavy-duty rust. In fact, some are downright artsy!
MY SECOND GOAL was trying another idea that Steve suggested: creating a patina (color) on clean, shiny steel using heat. I took out my MAPP gas torch, read the instructions, lined four cleaned metal pieces side by side on my brick and gravel path, then struck up the torch. Nothing happened right away. But Wait! I saw a glimpse of blue coming up on the steel! An awesome bright blue, then soft salmon and rusty colors, and oranges, and lilac, and some white! All before my eyes from the torch! I went CRAZY all afternoon, dunking and cleaning more metal, then torching the mess out of them.
Look at what I did today, mom! Experimenting with partial acid washing, part natural rusting, and heat-enhanced patinas gave some really awesome painterly artwork.
I’ll probably powder coat these beauties to protect them from the outside elements. Here’s a video that shows you how I put together recycled metal and ceramics to make tall totems for th garden: